7.4.1.1 Schema mapping in ESRI ArcGIS
This section provides an example of schema mapping using ESRI ArcGIS software, including ArcMap, ArcCatalog, and ArcToolbox. The procedure requires connecting to the spatial data container (file geodatabase, shapefile, or SDE database), creating a new feature class using the GeoSciML-Portrayal schema if an empty template is not available, and loading data from the source dataset into the GeoSciML-Portrayal schema feature class.
Prepare feature class
- Open ArcCatalog
- Locate or create the geodatabase that will host the data for your GeoSciML-Portrayal web services. To start, it is probably a good idea to work in a new geodatabase, but in the long run the organization of feature classes and geodatabases for production services should be determined by local data management policies.
- Connect to the desired spatial database
- If you are using a shapefile or file or personal geodatabase, navigate to it in the file system tree in ArcCatalog.
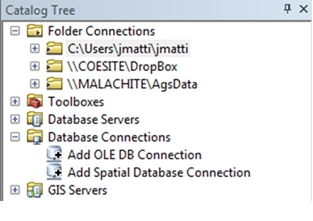
- If you are using and SDE geodatabase, you will need to connect to the database using Database Connections (Figure 1). In the Spatial Database Connection window, specify the location and (if necessary) the credentials needed to access the desired spatial database. Click OK when finished.
- If you are using a shapefile or file or personal geodatabase, navigate to it in the file system tree in ArcCatalog.
- If you are starting with a new geodatabase or shapefile, you need to create a feature class with the fields required by the appropriate GeoSciML-Portrayal feature class (geologicUnitView, contactView or shearDisplacementStructureView). It is useful to create a set of empty feature class templates in one geodatabase and copy these to create new instances. To create a new feature class, right-click the desired database and in the context menu that appears, click New > Feature Class... This will bring up the New Feature Class dialogue box.
- In the New Feature Class dialogue box, type the name for your feature class (this is not the name of the web service). Use the pull down menu to select the appropriate Type of feature geometry for the data you are going to publish. When you are finished filling out the form, click Next. Note that if you are loading into a shapefile, field names longer than 10 characters will be truncated; aliases assigned to the fields must contain the complete GeoSciML-Portrayal field name; see the ‘ESRI shapefile implementation’ section (below) for recommended aliases.
- Choose the coordinate system for your feature class. OneGeology requires that all services are available in the WGS 1984 coordinate reference system, so this is the easiest to use for feature classes for OneGeology services. To select the WGS 1984 coordinate system, navigate to the Geographic Coordinate System > World directory and click the WGS 1984 coordinate system. When you have located and selected the desired coordi-nate system, click Next.
- Specify the resolution for your feature class. The XY tolerance defaults to 0.000000008983153, which is fine for most applications, but may be changed if necessary by entering an appropriate value into the XY Tolerance field. When finished, click Next.
- Specify the Configuration keywords for your feature class if you are using any. The default is fine for most database storage architectures. When finished, click Next.
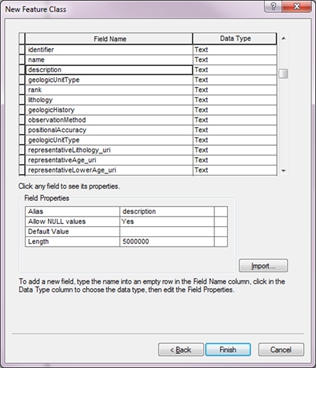
- Enter appropriate field names under the Field Name column; All field names (or field aliases if you are using shape files) and associated parameters must conform exactly to the GeoSciML-Portrayal schema for the feature class you are implementing (see Table 1, Table 2, or Table 3). This includes capitalization, spacing, underscores in names, data types, field lengths, and cardinality.
- Specify the parameters for each field by entering appropriate values in the Data Type column and in the Field Properties section (Figure 2).
- When done, click Finish.
Load data into feature class
Next, you will use ArcToolbox to import and map your existing data into the new feature class you just selected or created above.
- Open ArcCatalog
- On the menu bar of ArcCatalog, click the ArcToolbox button

- In ArcToolbox, click Data Management Tools > General > Append

- In the Append window (Figure 3), you need to perform a number of tasks:
- Specify the Input Dataset. This will be your source data that does not conform to the GeoSciML-Portrayal schema
- Specify the Target Dataset. This will be a feature class that conforms to the GeoSciML-Portrayal schema, e.g. the feature class you created above. Data from the input dataset
- Change the default Schema Type to NO_TEST. This last instruction is very important; it allows you to perform the schema mapping
- Using the Field Map (optional) table, match each field in the Input Dataset to the appropriate GeoSciML-Portrayal field in the Target Dataset:
- Right-click a target field in the Field Map (optional) table
- In the context menu that appears, click Add Input Field
- In the dialog box that appears, select the corresponding field from your Input Dataset
- Repeat steps i-iii for every field in the Target Dataset
- When finished, click OK
- Repeat Step 4 in this list for each dataset you wish to deploy as a web service
The feature classes are now ready to deploy your services. Double check the feature class content to make sure that all content is in order. In many cases you may need to update some fields with additional information.
Section last modified: 11 June 2013