1.4.1.4 Creating and using Web Map Context (WMC) documents
Saving your current OneGeology Portal view as a Web Map Context document is an easy way to save your personal data view and allows you to open the same view again at a later date. This avoids the need to keep adding layers to the view each time you enter the OneGeology Portal. This is most useful if viewing a large number of layers at any one time.
This also allows you to share your map session with other people, either by giving them a copy of the file, or by making the file available on a public web server.
‘Web Map Context Documents’ (http://www.opengeospatial.org/standards/wmc) is an OGC specification and any WMC document created in the OneGeology Portal should be usable in a number of client software applications.
Saving your context file
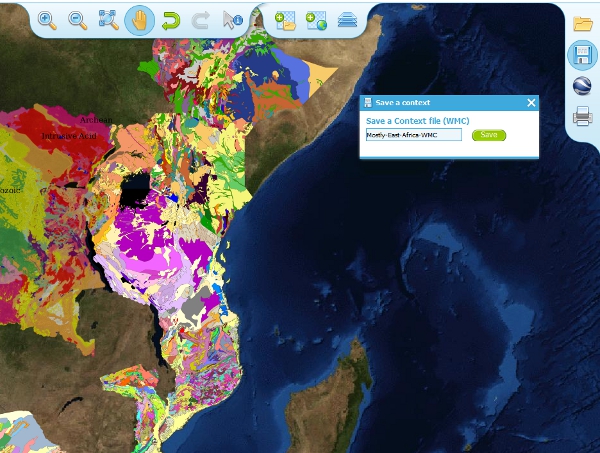
- Click the Save WMC context button to create a WMC document
- Enter a file name of your choice that you will save the WMC as, and click OK.
Note when naming your Web Map Context document(which is in XML format) you should provide only the name and not the file ending, for example, if you name a file ‘IrelandGeology’ in the dialog box the resultant file will be called ‘IrelandGeology.xml’. If you do add a file ending you will still get an .xml file suffix, for example if you name your file ‘IrelandGeology.wmc’ the resultant file will be called ‘IrelandGeology.wmc.xml’
This will create a Web Map Context document containing all the geology maps you currently have added to the OneGeology Portal and the Blue Marble base layer, but will not currently add any of the layers that were automatically selected.
Opening a Web Map Context file in the OneGeology Portal
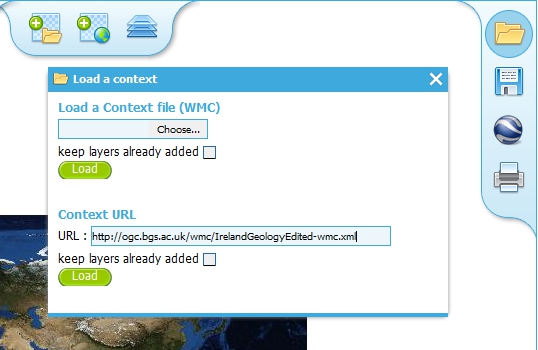
To open a Web Map Context document in the OneGeology Portal, you need to select the ‘Load a WMC context’ menu option (folder icon)
You have the choice to ‘Load a Context file (WMC)’ that you have already saved on your PC, or to use a ‘Context URL’, that is a Web Map Context file that has been made available on some web server (as in this figure example). You also have the option to keep the layers that are already loaded in you map, or to just view the layers in the context file (which is the default option). Note that currently you still get the automatically selected layers showing, even if you chose not to keep the layers already added.

When you have made your selection, click the ‘Load’ button to load the context file and view the saved map session.
Alternatively you can use the external Web Map Context URL as a parameter value to append to the OneGeology Portal URL, to automatically open the map session captured in context file. This functionality is particularly useful if you want to provide a link to the OneGeology Portal (on a website or in an email to someone) with your map automatically showing.
To do this you need to send a request like:
https://portal.onegeology.org/?
language=eng&
method=addExternalContext&
url=https://ogc.bgs.ac.uk/wmc/IrelandGeologyEdited-wmc.xml
Opening a WMC file in other clients
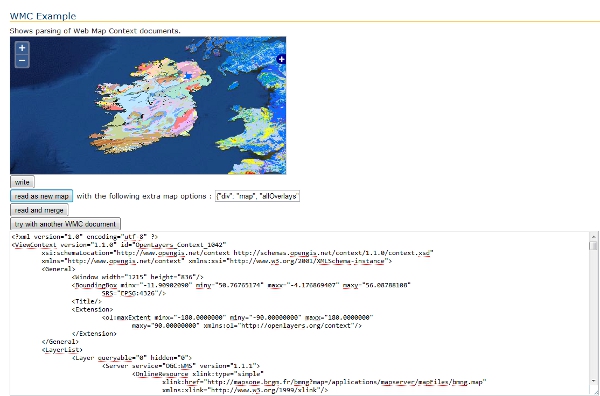
Other clients are known to support Web Map Context documents, for example we could load the example file (https://ogc.bgs.ac.uk/wmc/IrelandGeologyEdited-wmc.xml) in an OpenLayers client like the one at http://openlayers.org/dev/examples/wmc.html. Here we need to copy the contents of the file into the form window and click on the ‘read as new map’ button to view our map.
Known issues
If when you load your Web Map Context file you get an error, you should check that the file has the correct XML header, this is because some browsers are known to add an additional XML line at the top of the document when creating the file. So if you see the following lines at the top of your document:
<?xml version="1.0" encoding="utf-8" ?>
  <?xml version="1.0"?>
You will need to edit it so that is appears as:
<?xml version="1.0" encoding="utf-8" ?>
Section last modified: 28 June 2013


